Build your multi-room and multi-provider sound server with Platypush, Mopidy and Snapcast
How to leverage Platypush and other open-source projects to build an extensible and versatile music server.
Today’s abundance of music streaming services has created lots of opportunities to listen to whichever music you like wherever you like, but there’s a huge fragmentation problem that hasn’t been tackled seriously by the music tech industry yet.
Spotify allows you to find and discover a lot of tunes, but not all the music is there.
You may want to integrate your collection of mp3s into your Spotify collection, but that is simply not an option.
You may have favourite tracks that are only available on SoundCloud or albums that aren’t available on Spotify, but you’ve purchased in the past on Google Music or iTunes, but there’s no way to have them all in one place: each of these solution comes with its separate app.
You may want to integrate your favourite online radios or podcasts into your music app, but that’s, again, not an option — TuneIn, Podcast Addict or Google Podcasts are distinct apps.
You may want to easily stream your playlists to any speaker or pair of headphones you own, but that’s not as easy as it sounds. You may have to replace your existing speakers with expensive solutions (like Sonos or Bose) to enjoy a proper multi-room setup. Apps like Spotify come with their solutions (e.g. Spotify Connect), but only a limited number of devices is supported and, again, it works as a solution only as long as you stream Spotify content from the Spotify app.
There have been commercial solutions that have tried to tackle this fragmentation problem and provide you with the possibility to stream music from any app to any speaker without having to replace your audio system, but the situation isn’t that bright after Google has discontinued its Chromecast Audio support, and AirPlay works relatively well only as long as you’re in an Apple ecosystem.
As of today the problem “how do I play whichever piece of music I like, from whichever service I like, on whichever device I like, all in one interface, without having to install 10 different apps” is still largely unsolved if you rely on commercial solutions.
Luckily, we’ve got plenty of open source software around that comes to rescue. It requires a bit more work than just downloading an app and logging in, but the rewards are priceless.
One music server to rule them all
Mopidy is one of the best open source solutions around when it comes to integrating multiple music services under one single interface. It’s entirely written in Python, it’s (almost) 100% compatible with MPD, a music protocol that has been around since 2003 and comes with lots of compatible clients (command-line, web-based, mobile apps etc.), and there are countless plugins that let Mopidy integrate with any kind of music service around.
It’s relatively easy to install mopidy on a RaspberryPi and turn it into a powerful music centre.
- Add the mopidy repository to your apt lists and install the base package:
wget -q -O - https://apt.mopidy.com/mopidy.gpg | sudo apt-key add -

sudo wget -q -O /etc/apt/sources.list.d/mopidy.list https://apt.mopidy.com/buster.list

# Run the following command if you're running Raspbian/Debian Stretch
sudo wget -q -O /etc/apt/sources.list.d/mopidy.list https://apt.mopidy.com/stretch.list

# Update the repositories and install mopidy
sudo apt-get update
sudo apt-get install mopidy mopidy-mpd
- Install any additional extension for the music services you like:
# Spotify support
sudo apt-get install mopidy-spotify

# Local files support
sudo apt-get install mopidy-local

# Dirble support
sudo apt-get install mopidy-dirble

# Podcast support
sudo apt-get install mopidy-podcast mopidy-podcast-gpodder mopidy-podcast-itunes

# Last.FM scrobbling support
sudo apt-get install mopidy-scrobbler

# Soma.FM support
sudo apt-get install mopidy-somafm

# Soundcloud support
sudo apt-get install mopidy-soundcloud

# TuneIn support
sudo apt-get install mopidy-tunein

# YouTube support
sudo apt-get install mopidy-youtube
And there are even more extensions available for Mopidy - you may want to take a look on their website to get an overview of the compatible services.
Head to the pages of those extensions to find out whether they need some extra dependencies or extra configuration to be
added to your ~/.config/mopidy/mopidy.conf file.
You may also want to make sure that the HTTP module is enabled in your mopidy configuration, since most of the web frontends (including Platypush) rely on it to interact with mopidy over websockets:
[http]
enabled = true
hostname = 0.0.0.0
port = 6680
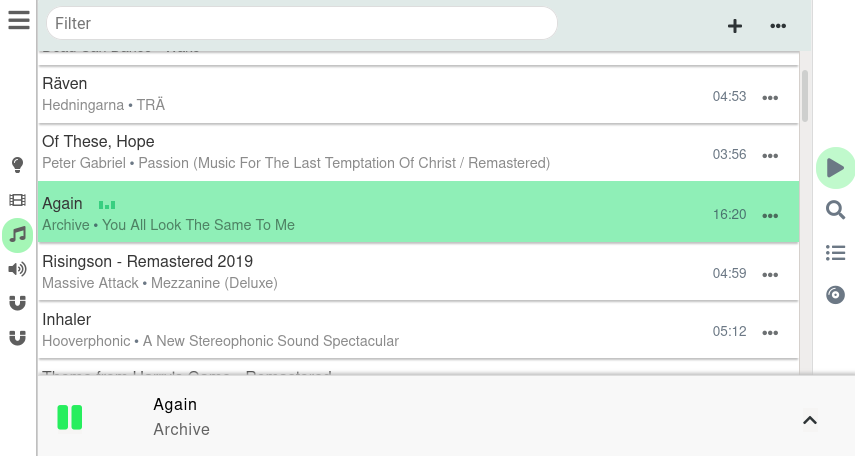
There is also a wide range of frontend clients available for Mopidy, from command-line MPD clients to full-blown web clients that do a very good job replicating the UI of some of the most popular music apps around. Let's have a quick overview of my favourite solutions to interact with Mopidy:
netcat/telnet. Mopidy is compatible with the MPD protocol, and once started it will listen by default on port 6600 for MPD commands. It’s relatively straightforward to explore your library or control the playback even without installing another client (although it’s probably not the most user-friendly way, but very good if you want to make some scripts):
$ echo status | nc localhost 6600
OK MPD 0.19.0
volume: 100
repeat: 0
random: 1
single: 0
consume: 0
playlist: 3
playlistlength: 1489
xfade: 0
state: stop
song: 513
songid: 560
nextsong: 173
nextsongid: 220
OK

$ echo currentsong | nc localhost 6600
OK MPD 0.19.0
file: spotify:track:218UgZapIcNRP9f38C5cMp
Time: 365
Artist: 3rd Force
Album: Vital Force
Title: Echoes Of A Dream
Date: 1997
Track: 6
Pos: 513
Id: 560
AlbumArtist: 3rd Force
X-AlbumUri: spotify:album:3mSCVZabNB0rUmpYgPkDuV
OK

$ echo play | nc localhost 6600
OK MPD 0.19.0
OK

$ echo stop | nc localhost 6600
OK MPD 0.19.0
OK
mpcis a tiny command-line utility that makes it a bit easier to interact with MPD/mopidy instances for scripting purposes without handling low-level protocol messages:
sudo apt-get install mpc
mpc help  # To see available commands
mpc play  # Play the music
ncmpcppis a ncurses-based terminal client that I've been using for more than a decade, and it's probably one of the lightest yet most versatile music clients I've seen around - and definitely my favourite:
sudo apt-get install ncmpcpp


mopidy-irisis probably one of the most user-friendly, well-maintained and feature-rich Mopidy clients around, and it's compatible with desktop, tablet and mobile and it comes with a UI that successfully mimics that of many popular music apps:
sudo apt-get install mopidy-iris
After installing it head to http://your-raspberry:6680 and select Iris as the web interface.

And you have many more compatible clients available (just check the list of extensions), from minimal, to feature-rich (such as MusicBox), to a specific client for party mode optimized for multiple users! And, being compatible with MPD, all the MPD clients out there should also work out of the box. And the list also includes a Mopidy Mobile app and several MPD apps for Android and iOS.
Hook Mopidy to Platypush
You can connect Platypush to Mopidy. That provides you with one more UI for interacting with your instance (embedded in the Platypush web panel), and it opens a world of possibilities when it comes to automating music interactions.
- Install Platypush with the HTTP and MPD dependencies:
[sudo] pip install 'platypush[http,mpd]'
- Enable the MPD/mopidy plugin and backend in your platypush configuration file:
music.mpd:
    host: localhost
    port: 6600

backend.music.mopidy:
    host: localhost
A backend.music.mpd is also provided, but if you use Mopidy instead of a bare MPD server then it's advised to use
backend.music.mopidy instead - the former checks for updates by polling the server at regular intervals, while the
Mopidy-specific backend listens for events continuously over the provided websocket interface.
- Restart Platypush and head to
http://your-raspberry:8008. You should see a new tab for Mopidy — yet another web interface to interact with the server.

Before proceeding on how to automate the interaction with your new music server, let's see how to turn Mopidy into a full multi-room music server with Snapcast.
Multi-room setup
The ability to synchronize music across multiple rooms and devices is a great feature of a modern smart home. However, most of the commercial solutions available today (like Sonos or Bose) are expensive and require in most of the cases to replace your speakers with theirs. Luckily it’s relatively easy to set up a multi-room experience with multiple RaspberryPis, without having to change your speakers. Let’s see how.
-
Install Snapcast by following the instructions on their Github page
-
Create an
/etc/default/snapserverfile on the machine(s) where you’re running your Mopidy instance(s) with the following content:
USER_OPTS="--user snapserver:snapserver --stream=pipe:///tmp/snapfifo?name=mopidy&codec=pcm --codec=pcm"
SNAPSERVER_OPTS=""
In the example above we’ll use a PCM lossless codec for streaming the music, and we’ll be using /tmp/snapfifo as a
file queue where Mopidy will push its audio stream.
-
Start snapserver on your Mopidy machine(s) by simply running the executable, and optionally add it to your startup configuration.
-
Configure the [audio] section of your mopidy.conf file to stream to the Snapcast FIFO (note: with this configuration Mopidy will only stream to the new file and not to your speakers, you'll need to run
snapclientto play the audio):
[audio]
mixer = software
mixer_volume = 100
output = audioconvert ! audio/x-raw,rate=48000,channels=2,format=S16LE ! wavenc ! filesink location=/tmp/snapfifo
The audio.output setting of Mopidy is actually a very flexible way of building GStreamer pipelines to redirect and
transform the audio however you like. In this example I'm transforming the audio to stereo WAV at 48 kHz, which may be
perfect if you're seeking for a true loseless audio experience, but may cause some glitches if your network isn't very
stable (we're basically passing uncompressed audio around). It's possible to encode and compress the stream by applying
e.g. an MP3 or OGG encoder to the pipeline, but this causes the GStreamer pipeline to become very unstable for some
reason (the bug has been opened for a couple of years and Mopidy developers are still scratching their head on why it
happens), so the loseless stream option may be the only one that works for now.
- Create an
/etc/default/snapclientfile on all the machines that will be connecting to your Snapserver, included the Mopidy machine itself if you want to directly play music from too (opposed to using it just as a music backend):
START_SNAPCLIENT=true
USER_OPTS="--user snapclient:audio"
-
Start
snapclienton the machines that will be connecting to your Mopidy instance. The command will besnapclient -h localhoston the machine that runs mopidy itself andsnapclient -h remote-host-ip-or-nameon the other machines. You can run as manysnapclientinstances on a host as the servers you want to connect it to. -
Enable the Snapcast backend and plugin in the Platypush configuration of each of the machines that will be running the client or the server:
backend.music.snapcast:
    hosts:
        - server1
        - server2
        - server3

music.snapcast:
    host: default-server-ip-or-name
- Restart Platypush and head to the web panel on port 8008. You should see a new tab for Snapcast, identified by the speaker icon. From here you can control which stream will be playing on which host, you can create streaming groups, change the volume etc.

- You can also install an Android app to control your multi-room setup, even though the app allows you to control one server at the time. The app however will allow you to play audio streams also on your smartphone.

If you use Iris as a web interface to Mopidy you can now head to settings and enable the Snapcast plugin. A speaker icon will appear in the bottom bar, and you’ll be able to control your music setup from there as well.
Time to enjoy your low-cost but powerful multi-room music setup!
Build your remote to control the music
All of us have some unused infrared remote collecting dust somewhere in the living room. In this section I’ll show how to turn it into a universal remote for controlling your music (and not only) with some Platypush automation. You’ll need the following:
-
An infrared receiver — they’re usually very cheap. Any of them will do, even though I personally used this model.
-
An Arduino or Arduino-compatible device (or an ESP8266, or a RaspberryPi Pico, or any other microcontroller, although the code may be different). Most of the infrared sensors around communicate over an analog interface, but the RaspberryPi doesn’t come with an ADC converter. The solution is to plug an Arduino over USB and let it monitor for changes on the detected infrared signal.
-
A breadboard.
Once you’ve got all the hardware you can set up your receiver:
- Plug the infrared receiver to GND and Vcc, and the data PIN to e.g. the Arduino PIN 2, as shown in the figure below:

-
Download and install the Arduino IRremote library.
-
Prepare a sketch that reads the data from the infrared receiver PIN and writes it over serial interface as a JSON:
#include <IRremote.h>

// When a signal with all bits set to 1 is received it
// usually means that the previous pressed key is still
// being pressed, until a signal with all bits set to
// zero is received.
#define IR_REPEAT 0xFFFFFFFF

const int RECV_PIN = 2;

IRrecv irrecv(RECV_PIN);
decode_results results;
unsigned int latest_value = 0;

void setup(){
  Serial.begin(9600);
  irrecv.enableIRIn();
  irrecv.blink13(true);
}

void send_value(unsigned int value) {
  Serial.print("{\"ir\":");
  Serial.print(value, HEX);
  Serial.println("}");
}

void loop(){
  if (irrecv.decode(&results)){
    if (results.value == IR_REPEAT && latest_value != 0) {
      send_value(latest_value);
    } else if (results.value && results.value != latest_value) {
      send_value(results.value);
    }

    latest_value = results.value;
    irrecv.resume();
  }
}
-
Compile the sketch and upload it to the Arduino.
-
Open the Arduino serial monitor and verify that you see the JSON string when you press a key on the remote.
-
Enable the serial plugin and backend in your platypush configuration:
serial:
    device: /dev/ttyUSB0

backend.sensor.serial:
    enabled: True
- Restart platypush, check the output and press a key on your remote. You should see an event in the logs that looks like this:
INFO|platypush|Received event: {"type": "event", "target": "hostname", "origin": "hostname", "args": {"type": "platypush.message.event.sensor.SensorDataChangeEvent", "data": {"ir": "4b34d827"}}}
- Take note of the hexadecimal code reported on the event, that’s the decoded data associated to that specific remote button. Then add an event hook to deal with the actions to be run when a certain button is pressed:
from platypush.config import Config
from platypush.event.hook import hook
from platypush.utils import run

from platypush.message.event.sensor import SensorDataChangeEvent

@hook(SensorDataChangeEvent)
def on_remote_key_press(event, **context):
  ir_code = event.data.get('ir')
  if not ir_code:
    return

  # Playback control logic
  if ir_code == 'code1':
    run('music.mpd.play')
  elif ir_code == 'code2':
    run('music.mpd.pause')
  elif ir_code == 'code3':
    run('music.mpd.stop')
  elif ir_code == 'code5':
    run('music.mpd.previous')
  elif ir_code == 'code6':
    run('music.mpd.next')
  # ...
  # Multi-room setup logic
  elif ir_code == 'code7':
    # Un-mute the stream to another host
    run('music.snapcast.mute', host=Config.get('device_id'), client='some-client',
        mute=False)
  elif ir_code == 'code8':
    # Mute the stream to another host
    run('music.snapcast.mute', host=Config.get('device_id'), client='some-client',
        mute=True)
Congratulations, you’ve just built your own customizable and universal music remote!
Voice assistant integration
A smart music setup isn’t really complete without a voice assistant integration. I’ve covered in a previous article how to set up platypush to turn your device into a full-featured Google Assistant. If you’ve managed to get your assistant up and running, you can add some rules to control your music, play specific content, or synchronize your audio stream to another room. Let’s see a couple of examples:
from platypush.config import Config
from platypush.event.hook import hook
from platypush.utils import run

from platypush.message.event.assistant import SpeechRecognizedEvent

@hook(SpeechRecognizedEvent, phrase='play (the)? music')
def on_music_play(*args, **context):
  run('music.mpd.play')

@hook(SpeechRecognizedEvent, phrase='stop (the)? music')
def on_music_pause(*args, **context):
  run('music.mpd.stop')

@hook(SpeechRecognizedEvent, phrase='play (the)? radio')
def on_play_radio(*args, **context):
  run('music.mpd.play', resource='tunein:station:s13606')

@hook(SpeechRecognizedEvent, phrase='play playlist ${name}')
def on_play_playlist(event, name=None, **context):
  run('music.mpd.load', resource=name)

@hook(SpeechRecognizedEvent, phrase='play ${title} by ${artist}')
def search_and_play_song(event, title=None, artist=None, **context):
  results = run('music.mpd.search', artist=artist, title=title)
  if results > 0:
    run('music.mpd.play', resource=results[0]['file'])

@hook(SpeechRecognizedEvent, phrase='play (the)? music to (the)? bedroom')
def sync_music_to_bedroom(event, **context):
  run('music.snapcast.mute', host=Config.get('device_id'), client='bedroom', mute=False)
  run('music.snapcast.volume', host=Config.get('device_id'), client='bedroom', volume=90)
Conclusions
The current situation when it comes to music streaming and multi-room setup in a home automation environment is still extremely fragmented. Each commercial solution out there seems more interested in building its own walled garden, and a proper multi-room setup usually comes with high costs and in most of the cases it won’t be compatible with your existing speakers. With the ingredients provided in this article you should be able to walk around most of these limitations and:
-
Set up your multi-service music player controllable by any interface you like
-
Set up your multi-room configuration that makes it possible to add a new room by simply adding one more RaspberryPi
-
Use any existing infrared remote to control the music
-
Integrate custom music actions into a voice assistant
With these foundations in place the only limit to what you can do with your new music set up comes from your own imagination!
Reactions
How to interact with this page
Webmentions
To interact via Webmentions, send an activity that references this URL from a platform that supports Webmentions, such as Lemmy, WordPress with Webmention plugins, or any IndieWeb-compatible site.
ActivityPub
- Follow @blog@platypush.tech on your ActivityPub platform (e.g. Mastodon, Misskey, Pleroma, Lemmy).
- Mention @blog@platypush.tech in a post to feature on the Guestbook.
- Search for this URL on your instance to find and interact with the post.
- Like, boost, quote, or reply to the post to feature your activity here.