# Self-host your music experience on mobile
[//]: # (title: Self-host your music experience on mobile)
[//]: # (description: Build your mobile music streaming experience with Mopidy, Platypush, ntfy and Tasker)
[//]: # (image: https://s3.platypush.tech/static/images/mopidy-android-architecture-banner.png)
[//]: # (published: 2025-12-15)
I have written in the past
([here](https://blog.platypush.tech/article/Build-your-open-source-multi-room-and-multi-provider-sound-server-with-Platypush-Mopidy-and-Snapcast)
and [here](https://blog.platypush.tech/article/Automate-your-music-collection))
about my self-hosted home music setup based on [Mopidy](https://mopidy.com/),
[Platypush](https://platypush.tech/), and
[Snapcast](https://github.com/snapcast/snapcast).
I love it and I've been using it for years now. But until recently I couldn't
find a good way to break the music streaming jail on my mobile devices.
The Mopidy+Platypush setup allows for great flexibility: multiple music sources
(local files, Spotify, YouTube, Jellyfin, Tidal, Soundcloud, Bandcamp...),
multiple output devices (Snapcast clients, local audio output, Bluetooth
speakers...), multiple frontends (web, command line, Mopidy mobile apps...),
powerful automation capabilities through Platypush, and if you add Snapcast on
top you also get multi-room synchronized playback.
But on Android I've been stuck for a while with using multiple streaming apps
for different services (Spotify app for Spotify, YouTube app for YouTube Music,
VLC for local files, Jellyfin/Finamp to stream from my Jellyfin media
server...) and switching between them manually.
And those apps don't fit my use-cases very well either. The Tidal app in
particular is quite suboptimal - it may take 30-60 it seconds to perform a
simple search in a large playlist (when it doesn't crash), it immediately
freezes once playback starts in another location (like when my kid starts
playing music from his room), and it eats up 120 MB of storage just for the
base app (if you also have other music apps installed, you may easily hit the
500 MB mark without even downloading any music for offline playback). And, of
course, the trackers - oh, the trackers!
For a while I used the Platypush `music.mopidy` PWA to stream from my Mopidy
server on my mobile device, with the Snapcast app installed on my phone to get
a stream from the Mopidy server in my home, but that was not ideal either. I
needed an extra Mopidy server in my home with no audio devices attached to it
so that I could stream to my phone while outside without blasting music at
home, and the Snapcast stream had an intolerable latency (5-10 seconds, and it
grows worse the longer the stream is active).
So I decided to build a better mobile music streaming by bringing the
Mopidy+Platypush experience directly on my Android phone.
The architecture is shown in the diagram below:
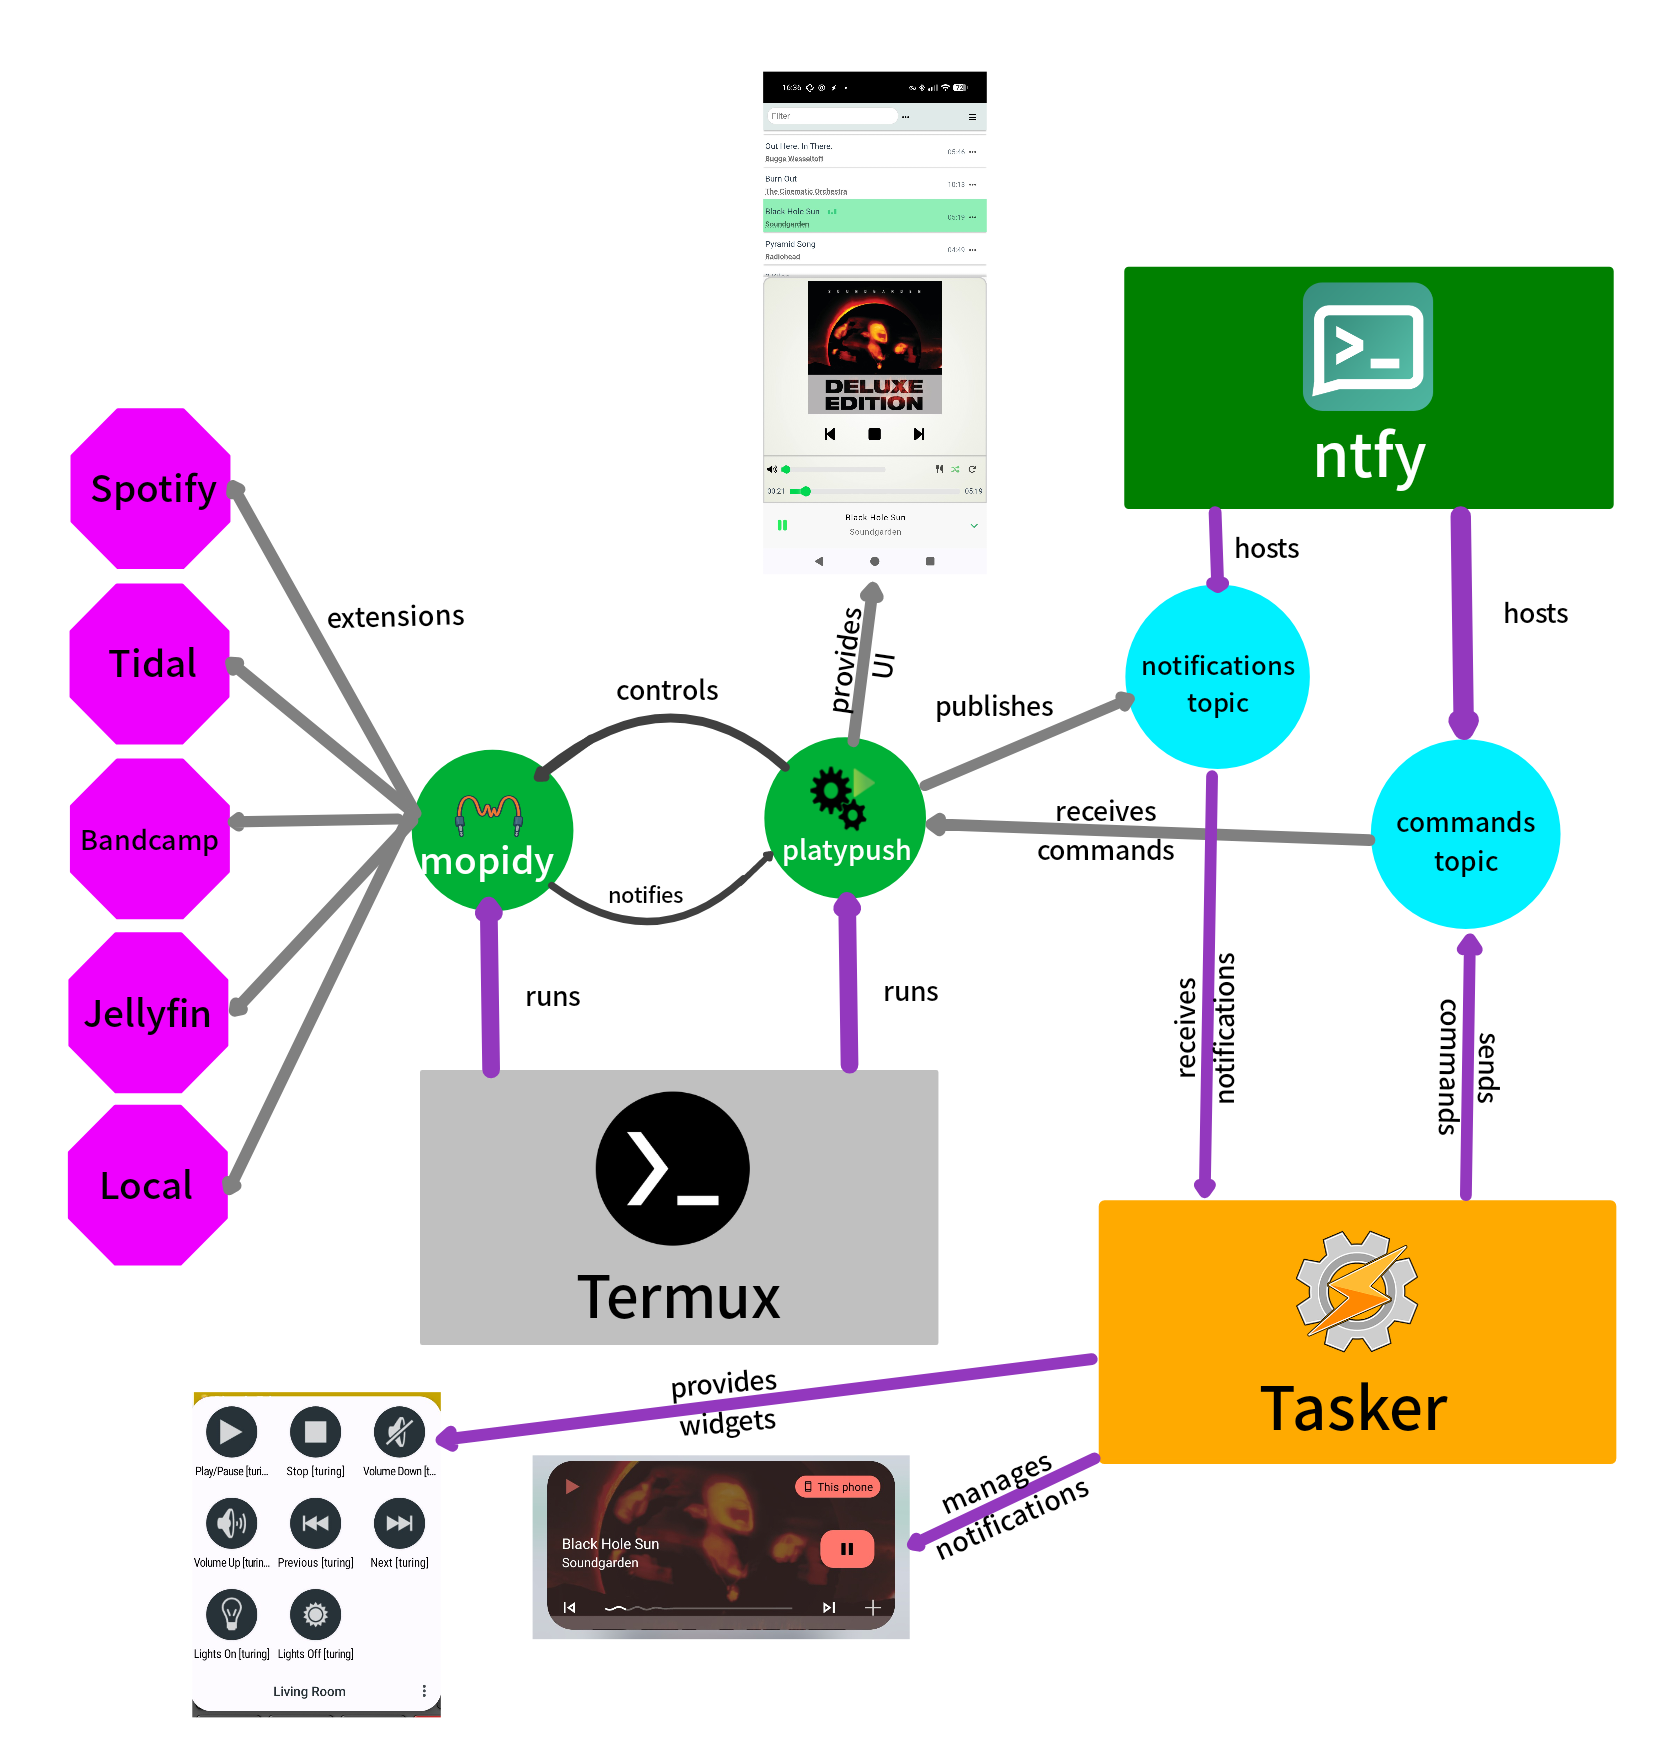 By the end of this article you'll have a self-hosted mobile music streaming
setup that doesn't rely on any third-party apps (but allows you to integrate
with third-party streaming services like Spotify or Bandcamp without having to
use their apps), and that you can fully control and automate through Platypush.
## Prerequisites
- An Android phone with at least 4 GB of RAM and sufficient storage space to
install some relatively large apps (Termux and Tasker)
- Sufficient confidence with Linux command line and Android automation tools.
## Dependencies
The following dependencies need to be installed on your Android phone:
- [Termux](https://termux.com/): a terminal emulator and Linux environment for
Android. You can install it from [F-Droid](https://f-droid.org/en/packages/com.termux/)
or [GitHub](https://github.com/termux/termux-app/releases).
- [Tasker](https://tasker.joaoapps.com/): a powerful Android automation app.
You can install it from the [Google Play
Store](https://play.google.com/store/apps/details?id=net.dinglisch.android.taskerm).
**NOTE**: Tasker is a paid app (about $5), but it's worth the price if you want to
automate stuff on your Android device. I have tried several times to break my
Tasker cage and rewrite my automations using Termux+Platypush, but the
Android ecosystem has so many quirks that don't apply to a standard Linux
environment, and that Tasker has already learned how to deal with, that I always
end up going back to it.
- [AutoNotification](https://play.google.com/store/apps/details?id=com.joaomgcd.autonotification),
a Tasker plugin to create and manage Android notifications. We'll need this
to create interactive media notifications to control playback through Tasker.
- [AutoTools](https://play.google.com/store/apps/details?id=com.joaomgcd.autotools):
a Tasker plugin that provides various utilities, including HTTP requests
and JSON parsing. We'll use this to interact with the ntfy service from
Tasker.
- [ntfy](https://ntfy.sh/): a simple notification service that can be used to
send push notifications to your Android device. You can install the ntfy app
from the [Google Play
Store](https://play.google.com/store/apps/details?id=io.heckel.ntfy)
or from [F-Droid](https://f-droid.org/en/packages/io.heckel.ntfy/).
## Termux setup
### Initial setup
After installing Termux, open the app, wait a bit for the initial setup to
complete, and then run the following commands to update the package lists and
upgrade the installed packages:
```bash
pkg update && pkg upgrade -y
```
And install the following base dependencies:
```bash
pkg install curl python redis termux-services
```
**NOTE**: There is a [known
issue](https://github.com/termux/termux-app/issues/2366#issuecomment-1237468220)
with Termux on Android 12 and later that prevents background services from
working properly. If you're using Android 12 or later, please follow the
instructions in that comment to fix the issue.
And remember to disable battery optimizations for Termux in your Android
settings, otherwise background services may be killed by the system.
### (Recommended) SSH setup
After installing Termux, it's recommended to set up SSH access to your Termux
environment so that you can easily connect to it from your computer for file
transfers and remote command execution.
Install the OpenSSH package:
```bash
pkg install openssh
```
Set a password for the `termux` user:
```bash
passwd
```
Then enable and start the SSH service:
```bash
sv-enable sshd
sv up sshd
```
Then retrieve your phone's IP address on the local network:
```bash
ifconfig | grep -A 2 wlan0
```
Note that for this to work your phone needs to be connected to the same Wi-Fi
network as your computer, or you can use a VPN client to connect them to the
same network, or USB tethering.
You can test the SSH connection from your computer with:
```bash
ssh -p 8022 PHONE_IP_ADDRESS
```
If you have `sshfs` installed on your computer, you can also mount your Termux home
directory as a local filesystem, which will facilitate file transfers:
```bash
mkdir -p ~/termux
sshfs -p 8022 PHONE_IP_ADDRESS: ~/termux
```
## Mopidy installation
Mopidy is a general-purpose music server that can play music from local files
and from various streaming services through extensions.
It provides extensions for [Spotify](https://mopidy.com/ext/spotify/),
[Jellyfin](https://mopidy.com/ext/jellyfin/),
[YouTube](https://mopidy.com/ext/youtube/), [Tidal](https://mopidy.com/ext/tidal/),
[Bandcamp](https://mopidy.com/ext/bandcamp/),
[SoundCloud](https://mopidy.com/ext/soundcloud/), [local files](https://mopidy.com/ext/local/),
and [much more](https://mopidy.com/extensions/).
It also provides extensions for [MPD](https://mopidy.com/ext/mpd/)
(_recommended_, as it provides out-of-the-box compatibility with many existing
MPD clients), an [official mobile app](https://mopidy.com/ext/mobile/), a good
[Web-based interface](https://mopidy.com/ext/iris/) that also doubles as a
mobile PWA, and many more extensions.
First, install the backend dependencies required by Mopidy:
```bash
pkg install gstreamer gst-plugins-base gst-plugins-good gst-plugins-bad gst-plugins-ugly
```
Install Mopidy (and all the extension you want) in the Termux environment using
pip:
```bash
pip install mopidy \
mopidy-mpd \
mopidy-iris \
mopidy-spotify \
mopidy-youtube \
mopidy-jellyfin \
mopidy-tidal \
mopidy-bandcamp \
mopidy-soundcloud \
mopidy-local \
...
```
### (Optional) Spotify setup
Optional steps for `mopidy-spotify`:
```bash
pkg install rust clang libllvm pkg-config git
git clone --depth 1 https://gitlab.freedesktop.org/gstreamer/gst-plugins-rs
cd gst-plugins-rs
cargo build --package gst-plugin-spotify --release
install -m 644 target/release/libgstspotify.so $(pkg-config --variable=pluginsdir gstreamer-1.0)/
gst-inspect-1.0 spotify
```
### Configuration
Start Mopidy from the command line once to generate the default configuration
file under `~/.config/mopidy/mopidy.conf`:
```bash
mopidy
```
Stop the process (Ctrl+C), open the file in your favourite text editor, and
uncomment or modify the sections relevant for your setup. Most of the streaming
extensions require you to set up API keys or client IDs, so make sure to follow
the instructions on the documentation of the relevant Mopidy extensions.
Start the service again once configured to verify that everything is working.
### Enable Mopidy as a background service
If you don't see any errors, you can enable Mopidy as a background service in Termux.
Unfortunately `termux-services` doesn't provide a native binding for Mopidy, nor
an easy way to provide a systemd-like experience in service management, but I
have put together a small script to make life easier:
For direct download + installation:
```bash
curl -sSL https://gist.manganiello.tech/fabio/termux-services-setup/raw/HEAD/termux-services-setup.sh | sh
```
Then run the Mopidy service installation script:
For direct download + installation:
```bash
curl -sSL https://gist.manganiello.tech/fabio/install-mopidy-termux-service/raw/HEAD/install-mopidy-termux-service.sh | sh
```
Then refresh the services and enable and start the Mopidy service:
```bash
install-termux-services
sv-enable mopidy
sv up mopidy
```
### Test the Mopidy setup
After starting the Mopidy service, you can check its logs to verify that
everything is working correctly:
```bash
sv-log -f mopidy
```
Then you have several ways of controlling Mopidy from your mobile device.
#### Command line
```bash
# NOTE: The mopidy-mpd extension must be installed and enabled
pkg install mpc
# Check available commands
mpc help
# Get the current status
mpc status
mpc current
# List available playlists
mpc lsplaylists
```
#### ncurses-based client
```bash
# NOTE: The mopidy-mpd extension must be installed and enabled
pkg install ncmpcpp
```
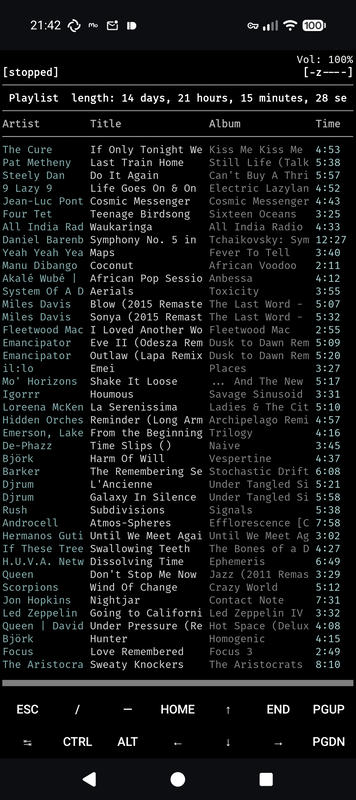
`ncmpcpp` has actually been my favourite music client since it came out in
2008. Its interface is minimal but extremely powerful, and it can be extended
in many ways through its configuration file. But it's probably not the best
choice to use on a mobile device (even though it does its job fine when
needed).
#### Web-based client
If you installed `mopidy-iris`, then you can access the Iris web interface from
your mobile browser at `http://localhost:6680/iris`.
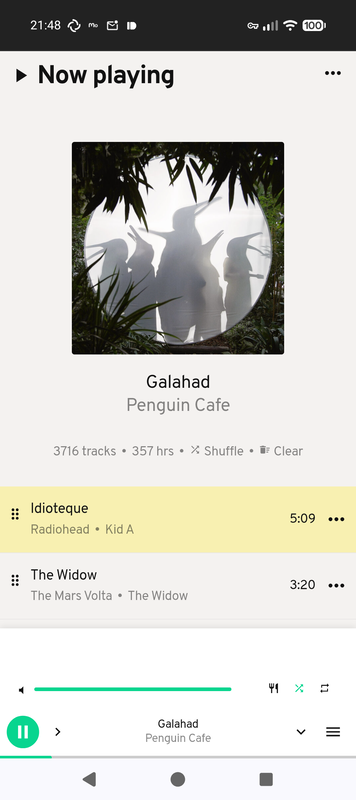
The good thing is that Iris is a PWA, so you can install it on your mobile home
screen for easy access, it will work offline as well and run outside of the
browser window.
Go to the Iris web interface in your mobile browser, open the browser menu,
and select "Add to Home screen".
Unfortunately, it doesn't provide a native integration with Android's media
controls, so you won't be able to control playback from the notification area
or from a connected Bluetooth device (see the next sections for details on how
to achieve that through Tasker+Platypush).
#### Native Android apps
You can also install the official Mopidy mobile app from the [Google Play
Store](https://play.google.com/store/apps/details?id=at.co.kemmer.mopidy_mobile),
and set the server address to `localhost:6680`.
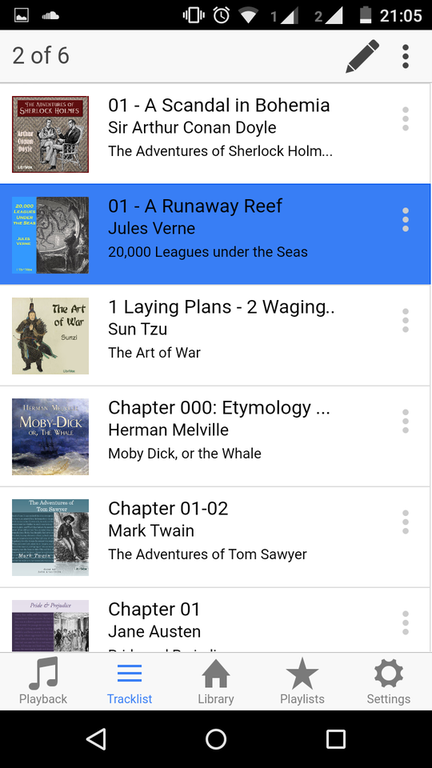
The interface looks a bit dated and the features are quite limited compared to
Iris, but it works fine for basic playback control.
And, if you enabled the `mopidy-mpd` extension, you can also use any MPD client
app to control playback (for example
[M.A.L.P.](https://f-droid.org/en/packages/org.gateshipone.malp/)).
Just remember in that case to set the server address to `localhost:6600`, as
these apps use the MPD protocol instead of the HTTP API.
Using MPD clients broadens the choice of available apps, as MPD has been around
for a long time and there are many clients available on the Play Store and F-Droid,
but it also misses some of the Mopidy-specific features that are only available
through the HTTP API (for example, media images, fast playlist loads, playlist
modifications on some streaming services...).
#### Wrapping up the Mopidy setup
At this point you should have a fully working Mopidy setup on your Android
phone. The only requirement is that Termux should be running in the background for
Mopidy to be active.
If you are happy with this setup and any of the options listed above, you can
stop reading here.
Otherwise, if you want more control, a faster client and support for Android's
native media controls, and a more scalable solution for media notifications if
you also run other Mopidy services (e.g. on your Raspberry Pi at home). keep
reading for the next steps.
## ntfy setup
We will use two topics on ntfy:
- `music-notifications-`: the Platypush integration will
publish playback state changes (play, pause, track change...) on this topic
as they happen, and Tasker will listen to this topic to update the media
notifications accordingly.
- `music-commands-`: Tasker will publish playback commands
(play, pause, next track, previous track...) on this topic when the user
interacts with the media notification, and the Platypush integration will
listen to this topic to execute the commands on Mopidy.
**NOTE**: Replace `` with a unique, preferably random,
identifier. Example command to generate a random ID:
```bash
head -c 8 /dev/urandom | base64 | tr '/+' '--' | tr -d '='
```
This is _very important_ because ntfy topics are public and, if you use a free
public instance, no authentication is required to publish or subscribe to them.
You can then install the ntfy Android app from the [Google Play
Store](https://play.google.com/store/apps/details?id=io.heckel.ntfy)
or from [F-Droid](https://f-droid.org/en/packages/io.heckel.ntfy/).
After installing the app, open it and subscribe to the two topics created above.
**IMPORTANT**: Disable battery optimizations for the ntfy app in your Android
settings. This is required to ensure that the app can receive notifications in
the background without being killed by the system.
**NOTE**: By default the ntfy app will use the public instance at `ntfy.sh`
(Web interface accessible at [https://ntfy.sh/app](https://ntfy.sh/app)).
This is fine if you are just testing the setup, but for production use, if you
have a spare server, VPS, laptop or Raspberry Pi laying around and a spare
domain name or subdomain, I recommend [setting up your own ntfy
server](https://docs.ntfy.sh/install/).
This should be quite straightforward through the Docker way:
```bash
docker run -d \
--name ntfy \
-p 8000:80 \
-v /path/to/ntfy/data:/var/lib/ntfy \
-e NTFY_BASE_URL=https://your.domain.tld \
binwiederhier/ntfy \
serve
```
You can also wrap it in a systemd service for easier management:
```ini
#!~/.config/systemd/user/ntfy.service
[Unit]
Description=ntfy server
After=network.target
[Service]
WorkingDirectory=/path/to/ntfy/data
ExecStart=/usr/bin/docker run --rm \
--name ntfy \
-p 8000:80 \
-v /path/to/ntfy/data:/var/lib/ntfy \
-e NTFY_BASE_URL=https://your.domain.tld \
binwiederhier/ntfy \
serve
ExecStop=/usr/bin/docker stop ntfy
Restart=always
RestartSec=10
[Install]
WantedBy=multi-user.target
```
Then enable and start the service with:
```bash
systemctl --user enable --now ntfy
```
Then look at the [documentation](https://docs.ntfy.sh/config/#nginxapache2caddy)
for instructions on how to set up a reverse proxy with TLS termination.
If you use the self-hosted instance, remember to update the ntfy app settings to
point to your server URL.
## Platypush setup
Now that we have Mopidy running and ntfy set up, we can install Platypush to
bridge notifications and commands between Mopidy and Tasker through ntfy.
Install Platypush in the Termux environment using pip. We will install the
dependencies for the `music.mpd`, `music.mopidy` and `ntfy` plugins. A full
list of available plugins can be found [here](https://docs.platypush.tech).
```bash
pip install 'platypush[music.mpd,music.mopidy,ntfy]'
```
This is the configuration for Platypush:
Download the configuration to a temporary location in Termux:
```bash
export TARGET="$PREFIX/tmp/platypush-mopidy-termux-conf"
```
Through git:
```bash
git clone https://gist.manganiello.tech/fabio/platypush-mopidy-termux-conf "$TARGET"
```
Or through direct zip download:
```bash
curl -sSL https://gist.manganiello.tech/fabio/platypush-mopidy-termux-conf/archive/HEAD > "$TARGET.zip"
mkdir -p "$TARGET"
unzip "$TARGET.zip" -d "$TARGET"
```
**IMPORTANT**: Before installing the configuration, make sure to edit the
placeholders for the ntfy topics and replace them with the actual topics you created
earlier:
```bash
cd "$TARGET"
find -type f | xargs grep -nH 'NOTE:'
# Take note of the files and line numbers where the placeholders are located,
# then edit them with your favourite text editor (e.g. nano, vim...)
```
Then install the configuration to the Platypush config directory:
```bash
cd "$TARGET"
chmod +x install.sh
./install.sh
```
Then manually start Platypush to verify that everything is working:
```bash
platypush
```
### Enable Platypush as a background service
If you don't see any errors, you can stop the service (Ctrl+C) and enable
Platypush as a background service in Termux:
For direct download + installation:
```bash
curl -sSL https://gist.manganiello.tech/fabio/install-platypush-termux-service/raw/HEAD/install-platypush-termux-service.sh | sh
```
Then refresh the services and enable and start the Platypush service:
```bash
install-termux-services
sv-enable platypush
sv up platypush
```
And check the logs to verify that everything is working:
```bash
sv-log -f platypush
```
### The Web interface
Once Platypush is running, you can access its Web interface at `http://localhost:8008`.
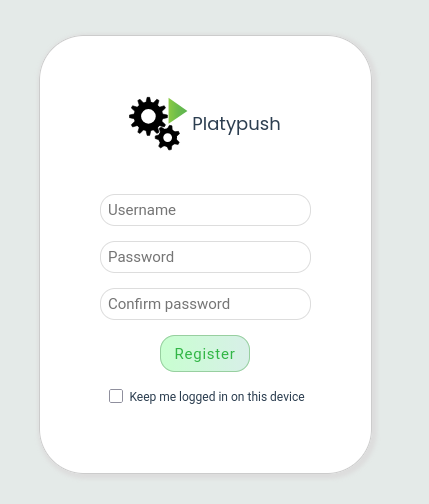
Upon first access, you'll be prompted to set up an admin user.
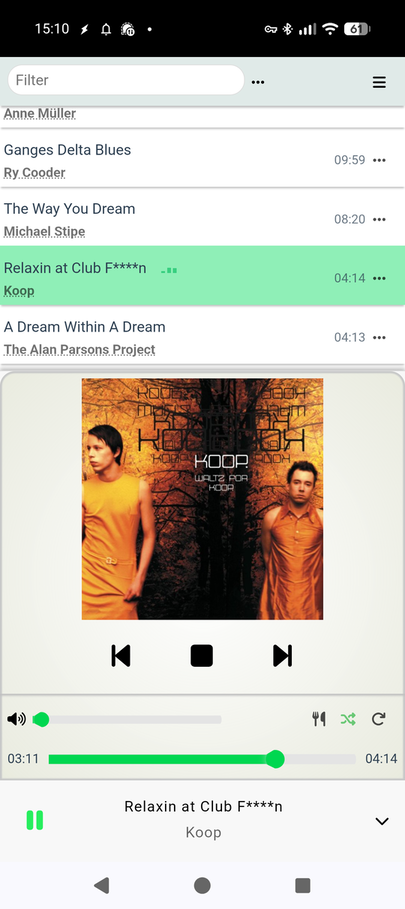
You will then see the `music.mopidy` in the menu bar on the left. Click on it
to access the Web client.
You can also click on the _Expand_ button on the right side of the plugin name to
open the single-plugin interface, or access it directly at
`http://localhost:8008/plugin/music.mopidy`.
This is similar to the Mopidy Iris interface, but it has better performance
(especially when handling large collections and large playlists, as Platypush
takes care of lazy loading and caching and does most of the filtering on the
client side), and it integrates better with more extensions than Iris' (which
uses Spotify's Web API to fetch most of the metadata).
Just like Iris, it can be installed as a PWA on your mobile home screen for
easy access.
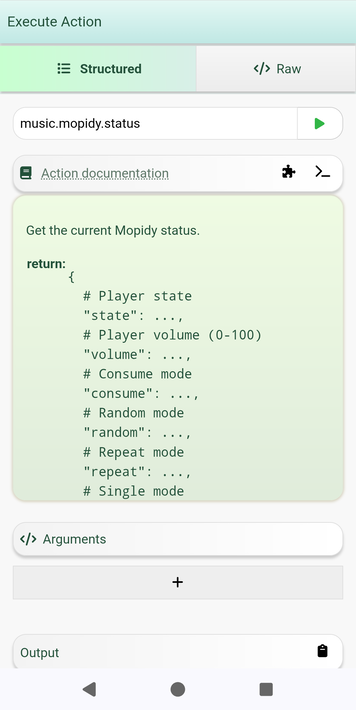
You can also explore all the available actions for the `music.mopidy` plugin from
the _Execute_ tab in the Web interface, which allows you to run any Platypush
actions directly from the browser.
## Tasker setup
At this point we have:
- Mopidy running on Termux, serving music from various sources
- Platypush running on Termux, bridging Mopidy and ntfy
- ntfy running on our Android device, receiving notifications from Platypush
Now we need to set up Tasker to listen to ntfy notifications and create media
notifications that allow us to control playback.
You'll need the following apps:
- [Tasker](https://tasker.joaoapps.com/)
- [AutoNotification](https://play.google.com/store/apps/details?id=com.joaomgcd.autonotification)
- [AutoTools](https://play.google.com/store/apps/details?id=com.joaomgcd.autotools)
- [AutoApps](https://play.google.com/store/apps/details?id=com.joaomgcd.autoappshub)
When you start Tasker for the first time, choose the "full experience" (not Tasky,
the simplified version of Tasker), and grant all the required permissions.
### Tasker: Create playback command tasks
The first thing we need is some tasks to send playback commands to Platypush
through the previously configured ntfy topic.
Select the "Tasks" tab in Tasker, then tap the "+" button to create a new task.
Call it "_Music Command Generic_". Then add new actions by tapping the "+" button at
the bottom right corner:
```
# The first parameter of this task includes the target of the command.
# It must match the device_id configured in Platypush.
# This is useful because it allows us to reuse the same ntfy topic to
# control multiple Mopidy instances (e.g. one at home, one on the phone...)
# by simply passing a different target device_id.
- Variable > Variable Set
Name: %device_id
To: %par1
# The second parameter is the command to send.
- Variable > Variable Set
Name: %command
To: %par2
# Build the JSON payload.
- Plugin > AutoTools > JSON Write
Configuration:
- Simple Values > Json Keys
- Content: %device_id,%command
- Simple Values > Json Values
- Content: %device_id,%command
- Json Result Variable
- Content: %payload
# Send the command to the ntfy topic.
- Net > HTTP Request
- Method: POST
- URL: /music-commands-
- Body: %payload
- Structure Output (JSON, etc.): ✔️
```
Now we can easily create specific tasks for each playback command by reusing
the generic task we just created.
Play/Pause command:
```
- New Task: Play/Pause [phone]
- Task > Perform Task
Name: Music Command Generic
Parameters:
# Must match the device_id configured in Platypush
- par1: phone
- par2: TOGGLE
```
Next track command:
```
- New Task: Next Track [phone]
- Task > Perform Task
Name: Music Command Generic
Parameters:
# Must match the device_id configured in Platypush
- par1: phone
- par2: NEXT
```
Previous track command:
```
- New Task: Previous Track [phone]
- Task > Perform Task
Name: Music Command Generic
Parameters:
# Must match the device_id configured in Platypush
- par1: phone
- par2: PREVIOUS
```
Stop playback command:
```
- New Task: Stop Playback [phone]
- Task > Perform Task
Name: Music Command Generic
Parameters:
# Must match the device_id configured in Platypush
- par1: phone
- par2: STOP
```
Run these tasks once to verify that they work correctly.
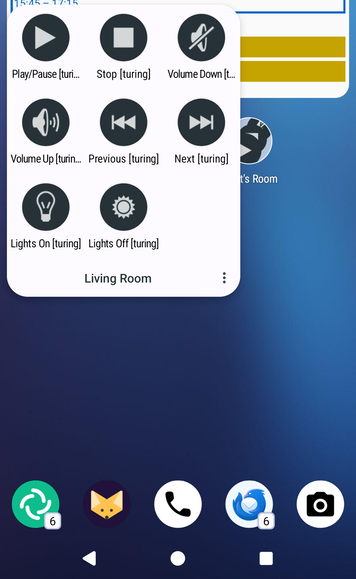
#### (Optional) Tasker: Install commands as widgets
Since these tasks may be used often and they're kind of self-contained, you can
also install them on your home screen for easier access. You have three options:
- Install them as Tasker widgets: long-press on your home screen, select
"Widgets", then find the "Tasker" section and drag the "Task" (or "Shortcut")
widget to your home screen. When prompted, select the task you want to assign
to the widget.
- Install them as apps: from Tasker, long-press on the task you want to install,
select "Export", then "As App". This will create a standalone app that you can
install on your device. You can then add it to your home screen like any other
app. Even though the process is slightly more cumbersome, and each additional
app takes some extra storage space, this method has the advantage that you can
group apps together in folders on your home screen, while widgets cannot be
grouped. Also, the apps can be directly launched from other apps or intents,
they can also be assigned to physical buttons, and they can be exported to
other devices more easily.
### Tasker: Create media notification profile
Now we need to create a Tasker profile that listens to ntfy notifications
from Platypush and creates an interactive media notification that allows us to
control playback.
Select the "Profiles" tab in Tasker, then tap the "+" button to create a new profile,
and call it e.g. "_On Music Notification_". Then select "Event" as the profile type,
then "System" > "Intent Received". Then configure the task as follows:
```
# Skip notifications that are not from the music-notifications topic
- Task > Stop
If: %topic neq "music-notifications-"
# Parse the notification payload
- Plugin > AutoTools > JSON Read
Configuration:
- Json: %message
- Fields: artist,title,album,date,duration,elapsed,image,device_id,state
# Warn and stop if the notification couldn't be parsed
- Task > If
Condition: %errmsg is set
- Alert > Flash
Text: "Error parsing music notification: %errmsg"
- Task > Stop
- Task > End If
# Set a unique ID for the notification updates from this device
- Variable > Variable Set
Name: %notification_id
To: music-%device_id
# Clear the notification and stop if the state is stopped
- Task > If
Condition: %state eq "stop"
- Plugin > AutoNotification > Cancel
Configuration:
- Notification ID: %notification_id
- Task > Stop
- Task > End If
# Convert the state and pick the icon
- Task -> If
Condition: %state eq "play"
- Variable > Variable Set
Name: %notif_state
To: playing
- Variable > Variable Set
Name: %action_icon
To: android.resource://net.dinglisch.android.taskerm/drawable/hl_ab_av_play
- Task > End If
- Task > If
Condition: %state eq "pause"
- Variable > Variable Set
Name: %notif_state
To: paused
- Variable > Variable Set
Name: %action_icon
To: android.resource://net.dinglisch.android.taskerm/drawable/hl_av_pause
- Task > End If
# Open the Platypush Mopidy UI when the notification is tapped
- Variable > Variable Set
Name: %base_url
To: http://localhost:8008/plugin/music.mopidy
# Convert duration and elapsed time to milliseconds
- Variable > Variable Set
Name: %duration
To: %duration * 1000
Do Maths: ✔️
If: %duration is set
- Variable > Variable Set
Name: %elapsed
To: %elapsed * 1000
Do Maths: ✔️
If: %elapsed is set
# Send the media notification
- Plugin > AutoNotification > AutoNotification
Structure Output (JSON, etc.): ✔️
Configuration:
- Updating and Persistency > ID
- Content: %notification_id
- Texts > Title
- Content: Music on %device_id
- Icons and Images > Icon
- Content: %action_icon
- Icons and Images > Status Bar Icon
- Content: ic_action_music_1
- Media > Media Layout > ✔️
- Media > Media Options > Track Name
- Content: %title
- Media > Media Options > Artist Name
- Content: %artist
- Media > Media Options > Album Name
- Content: %album
- Media > Media Options > Icon
- Content: %image
- Media > Media Options > Playback State
- Content: %notif_state
- Media > Media Options > Playback Position
- Content: %elapsed
- Media > Media Options > Playback Duration
- Content: %duration
- Media > Media Options > Command Play
- Content: music=:=%device_id=:=TOGGLE
- Media > Media Options > Command Pause
- Content: music=:=%device_id=:=TOGGLE
- Media > Media Options > Command Previous
- Content: music=:=%device_id=:=PREVIOUS
- Media > Media Options > Command Next
- Content: music=:=%device_id=:=NEXT
```
Now that we have the profile set up, we need to configure the hooks to the
specified media commands.
Create a new profile in Tasker, call it e.g. "_On Music Notification Command_",
select "Event" as the profile type, then "Plugin" > "AutoTools" > "AutoTools
Command". Then click on the pencil icon to configure the event, select
"_Command Filter_", and input `music=:=`.
Finally, create a new task for this profile to parse the command and execute
the corresponding playback task:
```
- Task > Perform Task
Name: Music Command Generic
Parameter 1 (%par1): %aacomm1
Parameter 2 (%par2): %aacomm2
```
And that's it!
Try and play some music on Mopidy on your phone and you should see the media
notification appearing in the notification area, allowing you to control playback
directly from there.
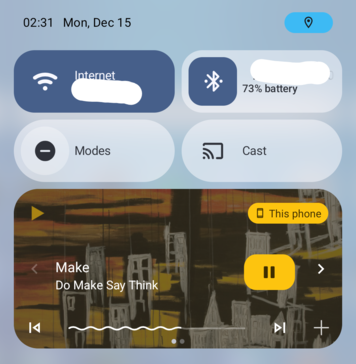
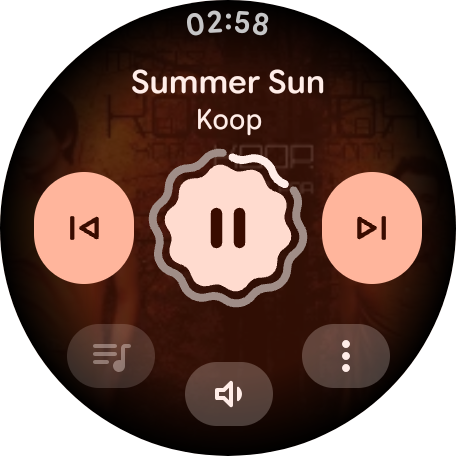
A bonus of this setup is that the media notification will also appear on the
lock screen, on connected Bluetooth devices and on Wear OS smartwatches,
allowing you to control playback from there as well.
## Adding more Mopidy instances
The beauty of this setup is that it can easily be extended to control multiple
Mopidy instances running on different devices, all from the same Tasker setup.
Most of the configuration can also be replicated to e.g. a Raspberry Pi at home -
just change the `device_id` in the Platypush configuration to e.g. `home`, and
create new Tasker tasks for playback commands that use `home` as the target.
You'll be able to control playback on your home Mopidy server from your phone
as well, and also receive media notifications from your home device.
## Conclusions
In this article we have seen how to build a self-hosted mobile music streaming
setup based on Mopidy, Platypush, ntfy and Tasker.
This setup allows you to stream music from various sources directly on your
Android phone, and control playback through interactive media notifications
created by Tasker.
If you want to learn about how to extend it to [support synchronized multi-room
playback with
Snapcast](https://blog.platypush.tech/article/Build-your-open-source-multi-room-and-multi-provider-sound-server-with-Platypush-Mopidy-and-Snapcast)
or [keep a record of your listening history across multiple
devices](https://blog.platypush.tech/article/Automate-your-music-collection),
check out my previous articles on the topic.
By the end of this article you'll have a self-hosted mobile music streaming
setup that doesn't rely on any third-party apps (but allows you to integrate
with third-party streaming services like Spotify or Bandcamp without having to
use their apps), and that you can fully control and automate through Platypush.
## Prerequisites
- An Android phone with at least 4 GB of RAM and sufficient storage space to
install some relatively large apps (Termux and Tasker)
- Sufficient confidence with Linux command line and Android automation tools.
## Dependencies
The following dependencies need to be installed on your Android phone:
- [Termux](https://termux.com/): a terminal emulator and Linux environment for
Android. You can install it from [F-Droid](https://f-droid.org/en/packages/com.termux/)
or [GitHub](https://github.com/termux/termux-app/releases).
- [Tasker](https://tasker.joaoapps.com/): a powerful Android automation app.
You can install it from the [Google Play
Store](https://play.google.com/store/apps/details?id=net.dinglisch.android.taskerm).
**NOTE**: Tasker is a paid app (about $5), but it's worth the price if you want to
automate stuff on your Android device. I have tried several times to break my
Tasker cage and rewrite my automations using Termux+Platypush, but the
Android ecosystem has so many quirks that don't apply to a standard Linux
environment, and that Tasker has already learned how to deal with, that I always
end up going back to it.
- [AutoNotification](https://play.google.com/store/apps/details?id=com.joaomgcd.autonotification),
a Tasker plugin to create and manage Android notifications. We'll need this
to create interactive media notifications to control playback through Tasker.
- [AutoTools](https://play.google.com/store/apps/details?id=com.joaomgcd.autotools):
a Tasker plugin that provides various utilities, including HTTP requests
and JSON parsing. We'll use this to interact with the ntfy service from
Tasker.
- [ntfy](https://ntfy.sh/): a simple notification service that can be used to
send push notifications to your Android device. You can install the ntfy app
from the [Google Play
Store](https://play.google.com/store/apps/details?id=io.heckel.ntfy)
or from [F-Droid](https://f-droid.org/en/packages/io.heckel.ntfy/).
## Termux setup
### Initial setup
After installing Termux, open the app, wait a bit for the initial setup to
complete, and then run the following commands to update the package lists and
upgrade the installed packages:
```bash
pkg update && pkg upgrade -y
```
And install the following base dependencies:
```bash
pkg install curl python redis termux-services
```
**NOTE**: There is a [known
issue](https://github.com/termux/termux-app/issues/2366#issuecomment-1237468220)
with Termux on Android 12 and later that prevents background services from
working properly. If you're using Android 12 or later, please follow the
instructions in that comment to fix the issue.
And remember to disable battery optimizations for Termux in your Android
settings, otherwise background services may be killed by the system.
### (Recommended) SSH setup
After installing Termux, it's recommended to set up SSH access to your Termux
environment so that you can easily connect to it from your computer for file
transfers and remote command execution.
Install the OpenSSH package:
```bash
pkg install openssh
```
Set a password for the `termux` user:
```bash
passwd
```
Then enable and start the SSH service:
```bash
sv-enable sshd
sv up sshd
```
Then retrieve your phone's IP address on the local network:
```bash
ifconfig | grep -A 2 wlan0
```
Note that for this to work your phone needs to be connected to the same Wi-Fi
network as your computer, or you can use a VPN client to connect them to the
same network, or USB tethering.
You can test the SSH connection from your computer with:
```bash
ssh -p 8022 PHONE_IP_ADDRESS
```
If you have `sshfs` installed on your computer, you can also mount your Termux home
directory as a local filesystem, which will facilitate file transfers:
```bash
mkdir -p ~/termux
sshfs -p 8022 PHONE_IP_ADDRESS: ~/termux
```
## Mopidy installation
Mopidy is a general-purpose music server that can play music from local files
and from various streaming services through extensions.
It provides extensions for [Spotify](https://mopidy.com/ext/spotify/),
[Jellyfin](https://mopidy.com/ext/jellyfin/),
[YouTube](https://mopidy.com/ext/youtube/), [Tidal](https://mopidy.com/ext/tidal/),
[Bandcamp](https://mopidy.com/ext/bandcamp/),
[SoundCloud](https://mopidy.com/ext/soundcloud/), [local files](https://mopidy.com/ext/local/),
and [much more](https://mopidy.com/extensions/).
It also provides extensions for [MPD](https://mopidy.com/ext/mpd/)
(_recommended_, as it provides out-of-the-box compatibility with many existing
MPD clients), an [official mobile app](https://mopidy.com/ext/mobile/), a good
[Web-based interface](https://mopidy.com/ext/iris/) that also doubles as a
mobile PWA, and many more extensions.
First, install the backend dependencies required by Mopidy:
```bash
pkg install gstreamer gst-plugins-base gst-plugins-good gst-plugins-bad gst-plugins-ugly
```
Install Mopidy (and all the extension you want) in the Termux environment using
pip:
```bash
pip install mopidy \
mopidy-mpd \
mopidy-iris \
mopidy-spotify \
mopidy-youtube \
mopidy-jellyfin \
mopidy-tidal \
mopidy-bandcamp \
mopidy-soundcloud \
mopidy-local \
...
```
### (Optional) Spotify setup
Optional steps for `mopidy-spotify`:
```bash
pkg install rust clang libllvm pkg-config git
git clone --depth 1 https://gitlab.freedesktop.org/gstreamer/gst-plugins-rs
cd gst-plugins-rs
cargo build --package gst-plugin-spotify --release
install -m 644 target/release/libgstspotify.so $(pkg-config --variable=pluginsdir gstreamer-1.0)/
gst-inspect-1.0 spotify
```
### Configuration
Start Mopidy from the command line once to generate the default configuration
file under `~/.config/mopidy/mopidy.conf`:
```bash
mopidy
```
Stop the process (Ctrl+C), open the file in your favourite text editor, and
uncomment or modify the sections relevant for your setup. Most of the streaming
extensions require you to set up API keys or client IDs, so make sure to follow
the instructions on the documentation of the relevant Mopidy extensions.
Start the service again once configured to verify that everything is working.
### Enable Mopidy as a background service
If you don't see any errors, you can enable Mopidy as a background service in Termux.
Unfortunately `termux-services` doesn't provide a native binding for Mopidy, nor
an easy way to provide a systemd-like experience in service management, but I
have put together a small script to make life easier:
For direct download + installation:
```bash
curl -sSL https://gist.manganiello.tech/fabio/termux-services-setup/raw/HEAD/termux-services-setup.sh | sh
```
Then run the Mopidy service installation script:
For direct download + installation:
```bash
curl -sSL https://gist.manganiello.tech/fabio/install-mopidy-termux-service/raw/HEAD/install-mopidy-termux-service.sh | sh
```
Then refresh the services and enable and start the Mopidy service:
```bash
install-termux-services
sv-enable mopidy
sv up mopidy
```
### Test the Mopidy setup
After starting the Mopidy service, you can check its logs to verify that
everything is working correctly:
```bash
sv-log -f mopidy
```
Then you have several ways of controlling Mopidy from your mobile device.
#### Command line
```bash
# NOTE: The mopidy-mpd extension must be installed and enabled
pkg install mpc
# Check available commands
mpc help
# Get the current status
mpc status
mpc current
# List available playlists
mpc lsplaylists
```
#### ncurses-based client
```bash
# NOTE: The mopidy-mpd extension must be installed and enabled
pkg install ncmpcpp
```

`ncmpcpp` has actually been my favourite music client since it came out in
2008. Its interface is minimal but extremely powerful, and it can be extended
in many ways through its configuration file. But it's probably not the best
choice to use on a mobile device (even though it does its job fine when
needed).
#### Web-based client
If you installed `mopidy-iris`, then you can access the Iris web interface from
your mobile browser at `http://localhost:6680/iris`.

The good thing is that Iris is a PWA, so you can install it on your mobile home
screen for easy access, it will work offline as well and run outside of the
browser window.
Go to the Iris web interface in your mobile browser, open the browser menu,
and select "Add to Home screen".
Unfortunately, it doesn't provide a native integration with Android's media
controls, so you won't be able to control playback from the notification area
or from a connected Bluetooth device (see the next sections for details on how
to achieve that through Tasker+Platypush).
#### Native Android apps
You can also install the official Mopidy mobile app from the [Google Play
Store](https://play.google.com/store/apps/details?id=at.co.kemmer.mopidy_mobile),
and set the server address to `localhost:6680`.

The interface looks a bit dated and the features are quite limited compared to
Iris, but it works fine for basic playback control.
And, if you enabled the `mopidy-mpd` extension, you can also use any MPD client
app to control playback (for example
[M.A.L.P.](https://f-droid.org/en/packages/org.gateshipone.malp/)).
Just remember in that case to set the server address to `localhost:6600`, as
these apps use the MPD protocol instead of the HTTP API.
Using MPD clients broadens the choice of available apps, as MPD has been around
for a long time and there are many clients available on the Play Store and F-Droid,
but it also misses some of the Mopidy-specific features that are only available
through the HTTP API (for example, media images, fast playlist loads, playlist
modifications on some streaming services...).
#### Wrapping up the Mopidy setup
At this point you should have a fully working Mopidy setup on your Android
phone. The only requirement is that Termux should be running in the background for
Mopidy to be active.
If you are happy with this setup and any of the options listed above, you can
stop reading here.
Otherwise, if you want more control, a faster client and support for Android's
native media controls, and a more scalable solution for media notifications if
you also run other Mopidy services (e.g. on your Raspberry Pi at home). keep
reading for the next steps.
## ntfy setup
We will use two topics on ntfy:
- `music-notifications-`: the Platypush integration will
publish playback state changes (play, pause, track change...) on this topic
as they happen, and Tasker will listen to this topic to update the media
notifications accordingly.
- `music-commands-`: Tasker will publish playback commands
(play, pause, next track, previous track...) on this topic when the user
interacts with the media notification, and the Platypush integration will
listen to this topic to execute the commands on Mopidy.
**NOTE**: Replace `` with a unique, preferably random,
identifier. Example command to generate a random ID:
```bash
head -c 8 /dev/urandom | base64 | tr '/+' '--' | tr -d '='
```
This is _very important_ because ntfy topics are public and, if you use a free
public instance, no authentication is required to publish or subscribe to them.
You can then install the ntfy Android app from the [Google Play
Store](https://play.google.com/store/apps/details?id=io.heckel.ntfy)
or from [F-Droid](https://f-droid.org/en/packages/io.heckel.ntfy/).
After installing the app, open it and subscribe to the two topics created above.
**IMPORTANT**: Disable battery optimizations for the ntfy app in your Android
settings. This is required to ensure that the app can receive notifications in
the background without being killed by the system.
**NOTE**: By default the ntfy app will use the public instance at `ntfy.sh`
(Web interface accessible at [https://ntfy.sh/app](https://ntfy.sh/app)).
This is fine if you are just testing the setup, but for production use, if you
have a spare server, VPS, laptop or Raspberry Pi laying around and a spare
domain name or subdomain, I recommend [setting up your own ntfy
server](https://docs.ntfy.sh/install/).
This should be quite straightforward through the Docker way:
```bash
docker run -d \
--name ntfy \
-p 8000:80 \
-v /path/to/ntfy/data:/var/lib/ntfy \
-e NTFY_BASE_URL=https://your.domain.tld \
binwiederhier/ntfy \
serve
```
You can also wrap it in a systemd service for easier management:
```ini
#!~/.config/systemd/user/ntfy.service
[Unit]
Description=ntfy server
After=network.target
[Service]
WorkingDirectory=/path/to/ntfy/data
ExecStart=/usr/bin/docker run --rm \
--name ntfy \
-p 8000:80 \
-v /path/to/ntfy/data:/var/lib/ntfy \
-e NTFY_BASE_URL=https://your.domain.tld \
binwiederhier/ntfy \
serve
ExecStop=/usr/bin/docker stop ntfy
Restart=always
RestartSec=10
[Install]
WantedBy=multi-user.target
```
Then enable and start the service with:
```bash
systemctl --user enable --now ntfy
```
Then look at the [documentation](https://docs.ntfy.sh/config/#nginxapache2caddy)
for instructions on how to set up a reverse proxy with TLS termination.
If you use the self-hosted instance, remember to update the ntfy app settings to
point to your server URL.
## Platypush setup
Now that we have Mopidy running and ntfy set up, we can install Platypush to
bridge notifications and commands between Mopidy and Tasker through ntfy.
Install Platypush in the Termux environment using pip. We will install the
dependencies for the `music.mpd`, `music.mopidy` and `ntfy` plugins. A full
list of available plugins can be found [here](https://docs.platypush.tech).
```bash
pip install 'platypush[music.mpd,music.mopidy,ntfy]'
```
This is the configuration for Platypush:
Download the configuration to a temporary location in Termux:
```bash
export TARGET="$PREFIX/tmp/platypush-mopidy-termux-conf"
```
Through git:
```bash
git clone https://gist.manganiello.tech/fabio/platypush-mopidy-termux-conf "$TARGET"
```
Or through direct zip download:
```bash
curl -sSL https://gist.manganiello.tech/fabio/platypush-mopidy-termux-conf/archive/HEAD > "$TARGET.zip"
mkdir -p "$TARGET"
unzip "$TARGET.zip" -d "$TARGET"
```
**IMPORTANT**: Before installing the configuration, make sure to edit the
placeholders for the ntfy topics and replace them with the actual topics you created
earlier:
```bash
cd "$TARGET"
find -type f | xargs grep -nH 'NOTE:'
# Take note of the files and line numbers where the placeholders are located,
# then edit them with your favourite text editor (e.g. nano, vim...)
```
Then install the configuration to the Platypush config directory:
```bash
cd "$TARGET"
chmod +x install.sh
./install.sh
```
Then manually start Platypush to verify that everything is working:
```bash
platypush
```
### Enable Platypush as a background service
If you don't see any errors, you can stop the service (Ctrl+C) and enable
Platypush as a background service in Termux:
For direct download + installation:
```bash
curl -sSL https://gist.manganiello.tech/fabio/install-platypush-termux-service/raw/HEAD/install-platypush-termux-service.sh | sh
```
Then refresh the services and enable and start the Platypush service:
```bash
install-termux-services
sv-enable platypush
sv up platypush
```
And check the logs to verify that everything is working:
```bash
sv-log -f platypush
```
### The Web interface
Once Platypush is running, you can access its Web interface at `http://localhost:8008`.
Upon first access, you'll be prompted to set up an admin user.

You will then see the `music.mopidy` in the menu bar on the left. Click on it
to access the Web client.
You can also click on the _Expand_ button on the right side of the plugin name to
open the single-plugin interface, or access it directly at
`http://localhost:8008/plugin/music.mopidy`.
This is similar to the Mopidy Iris interface, but it has better performance
(especially when handling large collections and large playlists, as Platypush
takes care of lazy loading and caching and does most of the filtering on the
client side), and it integrates better with more extensions than Iris' (which
uses Spotify's Web API to fetch most of the metadata).
Just like Iris, it can be installed as a PWA on your mobile home screen for
easy access.

You can also explore all the available actions for the `music.mopidy` plugin from
the _Execute_ tab in the Web interface, which allows you to run any Platypush
actions directly from the browser.

## Tasker setup
At this point we have:
- Mopidy running on Termux, serving music from various sources
- Platypush running on Termux, bridging Mopidy and ntfy
- ntfy running on our Android device, receiving notifications from Platypush
Now we need to set up Tasker to listen to ntfy notifications and create media
notifications that allow us to control playback.
You'll need the following apps:
- [Tasker](https://tasker.joaoapps.com/)
- [AutoNotification](https://play.google.com/store/apps/details?id=com.joaomgcd.autonotification)
- [AutoTools](https://play.google.com/store/apps/details?id=com.joaomgcd.autotools)
- [AutoApps](https://play.google.com/store/apps/details?id=com.joaomgcd.autoappshub)
When you start Tasker for the first time, choose the "full experience" (not Tasky,
the simplified version of Tasker), and grant all the required permissions.
### Tasker: Create playback command tasks
The first thing we need is some tasks to send playback commands to Platypush
through the previously configured ntfy topic.
Select the "Tasks" tab in Tasker, then tap the "+" button to create a new task.
Call it "_Music Command Generic_". Then add new actions by tapping the "+" button at
the bottom right corner:
```
# The first parameter of this task includes the target of the command.
# It must match the device_id configured in Platypush.
# This is useful because it allows us to reuse the same ntfy topic to
# control multiple Mopidy instances (e.g. one at home, one on the phone...)
# by simply passing a different target device_id.
- Variable > Variable Set
Name: %device_id
To: %par1
# The second parameter is the command to send.
- Variable > Variable Set
Name: %command
To: %par2
# Build the JSON payload.
- Plugin > AutoTools > JSON Write
Configuration:
- Simple Values > Json Keys
- Content: %device_id,%command
- Simple Values > Json Values
- Content: %device_id,%command
- Json Result Variable
- Content: %payload
# Send the command to the ntfy topic.
- Net > HTTP Request
- Method: POST
- URL: /music-commands-
- Body: %payload
- Structure Output (JSON, etc.): ✔️
```
Now we can easily create specific tasks for each playback command by reusing
the generic task we just created.
Play/Pause command:
```
- New Task: Play/Pause [phone]
- Task > Perform Task
Name: Music Command Generic
Parameters:
# Must match the device_id configured in Platypush
- par1: phone
- par2: TOGGLE
```
Next track command:
```
- New Task: Next Track [phone]
- Task > Perform Task
Name: Music Command Generic
Parameters:
# Must match the device_id configured in Platypush
- par1: phone
- par2: NEXT
```
Previous track command:
```
- New Task: Previous Track [phone]
- Task > Perform Task
Name: Music Command Generic
Parameters:
# Must match the device_id configured in Platypush
- par1: phone
- par2: PREVIOUS
```
Stop playback command:
```
- New Task: Stop Playback [phone]
- Task > Perform Task
Name: Music Command Generic
Parameters:
# Must match the device_id configured in Platypush
- par1: phone
- par2: STOP
```
Run these tasks once to verify that they work correctly.
#### (Optional) Tasker: Install commands as widgets
Since these tasks may be used often and they're kind of self-contained, you can
also install them on your home screen for easier access. You have three options:
- Install them as Tasker widgets: long-press on your home screen, select
"Widgets", then find the "Tasker" section and drag the "Task" (or "Shortcut")
widget to your home screen. When prompted, select the task you want to assign
to the widget.
- Install them as apps: from Tasker, long-press on the task you want to install,
select "Export", then "As App". This will create a standalone app that you can
install on your device. You can then add it to your home screen like any other
app. Even though the process is slightly more cumbersome, and each additional
app takes some extra storage space, this method has the advantage that you can
group apps together in folders on your home screen, while widgets cannot be
grouped. Also, the apps can be directly launched from other apps or intents,
they can also be assigned to physical buttons, and they can be exported to
other devices more easily.

### Tasker: Create media notification profile
Now we need to create a Tasker profile that listens to ntfy notifications
from Platypush and creates an interactive media notification that allows us to
control playback.
Select the "Profiles" tab in Tasker, then tap the "+" button to create a new profile,
and call it e.g. "_On Music Notification_". Then select "Event" as the profile type,
then "System" > "Intent Received". Then configure the task as follows:
```
# Skip notifications that are not from the music-notifications topic
- Task > Stop
If: %topic neq "music-notifications-"
# Parse the notification payload
- Plugin > AutoTools > JSON Read
Configuration:
- Json: %message
- Fields: artist,title,album,date,duration,elapsed,image,device_id,state
# Warn and stop if the notification couldn't be parsed
- Task > If
Condition: %errmsg is set
- Alert > Flash
Text: "Error parsing music notification: %errmsg"
- Task > Stop
- Task > End If
# Set a unique ID for the notification updates from this device
- Variable > Variable Set
Name: %notification_id
To: music-%device_id
# Clear the notification and stop if the state is stopped
- Task > If
Condition: %state eq "stop"
- Plugin > AutoNotification > Cancel
Configuration:
- Notification ID: %notification_id
- Task > Stop
- Task > End If
# Convert the state and pick the icon
- Task -> If
Condition: %state eq "play"
- Variable > Variable Set
Name: %notif_state
To: playing
- Variable > Variable Set
Name: %action_icon
To: android.resource://net.dinglisch.android.taskerm/drawable/hl_ab_av_play
- Task > End If
- Task > If
Condition: %state eq "pause"
- Variable > Variable Set
Name: %notif_state
To: paused
- Variable > Variable Set
Name: %action_icon
To: android.resource://net.dinglisch.android.taskerm/drawable/hl_av_pause
- Task > End If
# Open the Platypush Mopidy UI when the notification is tapped
- Variable > Variable Set
Name: %base_url
To: http://localhost:8008/plugin/music.mopidy
# Convert duration and elapsed time to milliseconds
- Variable > Variable Set
Name: %duration
To: %duration * 1000
Do Maths: ✔️
If: %duration is set
- Variable > Variable Set
Name: %elapsed
To: %elapsed * 1000
Do Maths: ✔️
If: %elapsed is set
# Send the media notification
- Plugin > AutoNotification > AutoNotification
Structure Output (JSON, etc.): ✔️
Configuration:
- Updating and Persistency > ID
- Content: %notification_id
- Texts > Title
- Content: Music on %device_id
- Icons and Images > Icon
- Content: %action_icon
- Icons and Images > Status Bar Icon
- Content: ic_action_music_1
- Media > Media Layout > ✔️
- Media > Media Options > Track Name
- Content: %title
- Media > Media Options > Artist Name
- Content: %artist
- Media > Media Options > Album Name
- Content: %album
- Media > Media Options > Icon
- Content: %image
- Media > Media Options > Playback State
- Content: %notif_state
- Media > Media Options > Playback Position
- Content: %elapsed
- Media > Media Options > Playback Duration
- Content: %duration
- Media > Media Options > Command Play
- Content: music=:=%device_id=:=TOGGLE
- Media > Media Options > Command Pause
- Content: music=:=%device_id=:=TOGGLE
- Media > Media Options > Command Previous
- Content: music=:=%device_id=:=PREVIOUS
- Media > Media Options > Command Next
- Content: music=:=%device_id=:=NEXT
```
Now that we have the profile set up, we need to configure the hooks to the
specified media commands.
Create a new profile in Tasker, call it e.g. "_On Music Notification Command_",
select "Event" as the profile type, then "Plugin" > "AutoTools" > "AutoTools
Command". Then click on the pencil icon to configure the event, select
"_Command Filter_", and input `music=:=`.
Finally, create a new task for this profile to parse the command and execute
the corresponding playback task:
```
- Task > Perform Task
Name: Music Command Generic
Parameter 1 (%par1): %aacomm1
Parameter 2 (%par2): %aacomm2
```
And that's it!
Try and play some music on Mopidy on your phone and you should see the media
notification appearing in the notification area, allowing you to control playback
directly from there.

A bonus of this setup is that the media notification will also appear on the
lock screen, on connected Bluetooth devices and on Wear OS smartwatches,
allowing you to control playback from there as well.

## Adding more Mopidy instances
The beauty of this setup is that it can easily be extended to control multiple
Mopidy instances running on different devices, all from the same Tasker setup.
Most of the configuration can also be replicated to e.g. a Raspberry Pi at home -
just change the `device_id` in the Platypush configuration to e.g. `home`, and
create new Tasker tasks for playback commands that use `home` as the target.
You'll be able to control playback on your home Mopidy server from your phone
as well, and also receive media notifications from your home device.
## Conclusions
In this article we have seen how to build a self-hosted mobile music streaming
setup based on Mopidy, Platypush, ntfy and Tasker.
This setup allows you to stream music from various sources directly on your
Android phone, and control playback through interactive media notifications
created by Tasker.
If you want to learn about how to extend it to [support synchronized multi-room
playback with
Snapcast](https://blog.platypush.tech/article/Build-your-open-source-multi-room-and-multi-provider-sound-server-with-Platypush-Mopidy-and-Snapcast)
or [keep a record of your listening history across multiple
devices](https://blog.platypush.tech/article/Automate-your-music-collection),
check out my previous articles on the topic.